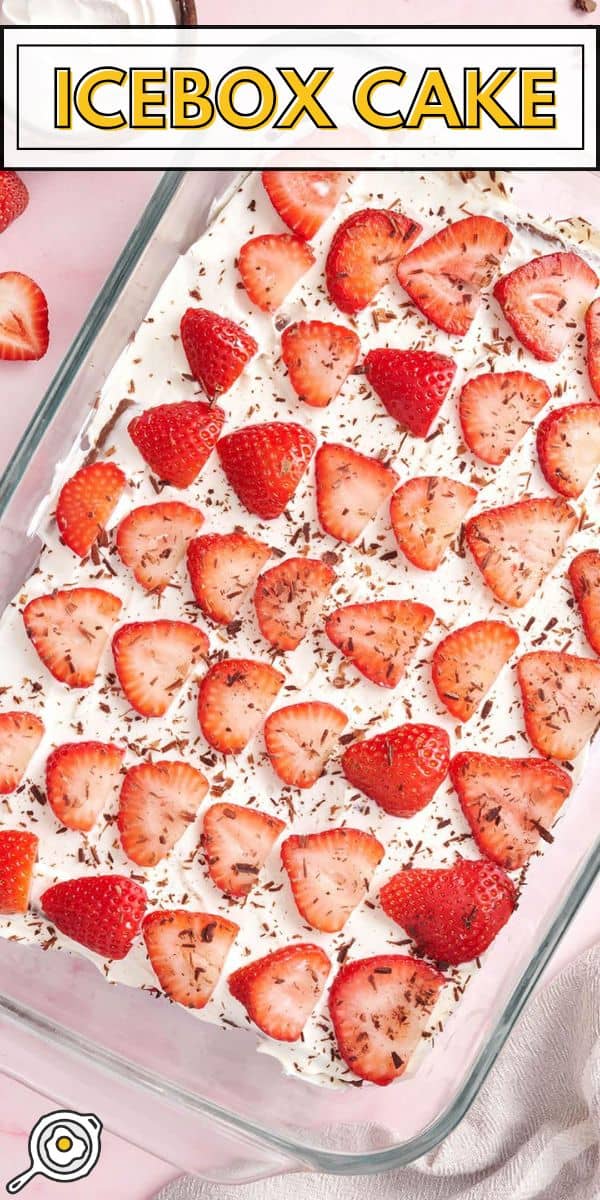
On days when it’s too hot to think about turning on the oven, this chocolate strawberry Icebox Cake gives me a cool, creamy dessert without heating up the kitchen. This 7-ingredient no-bake dessert layers chocolate graham crackers, fresh strawberries, vanilla cream cheese whipped cream, and shredded chocolate in a 9×13 baking dish, then the fridge does the rest. After a few hours of refrigeration, the layers soften into a sliceable cake-like dessert that’s easy to make for summer cookouts and potlucks!
Pin this recipe for later!

All recipes are rigorously tested in our Nashville Test Kitchen to ensure they are easy, affordable, and delicious.
No-Bake Creamy Desserts
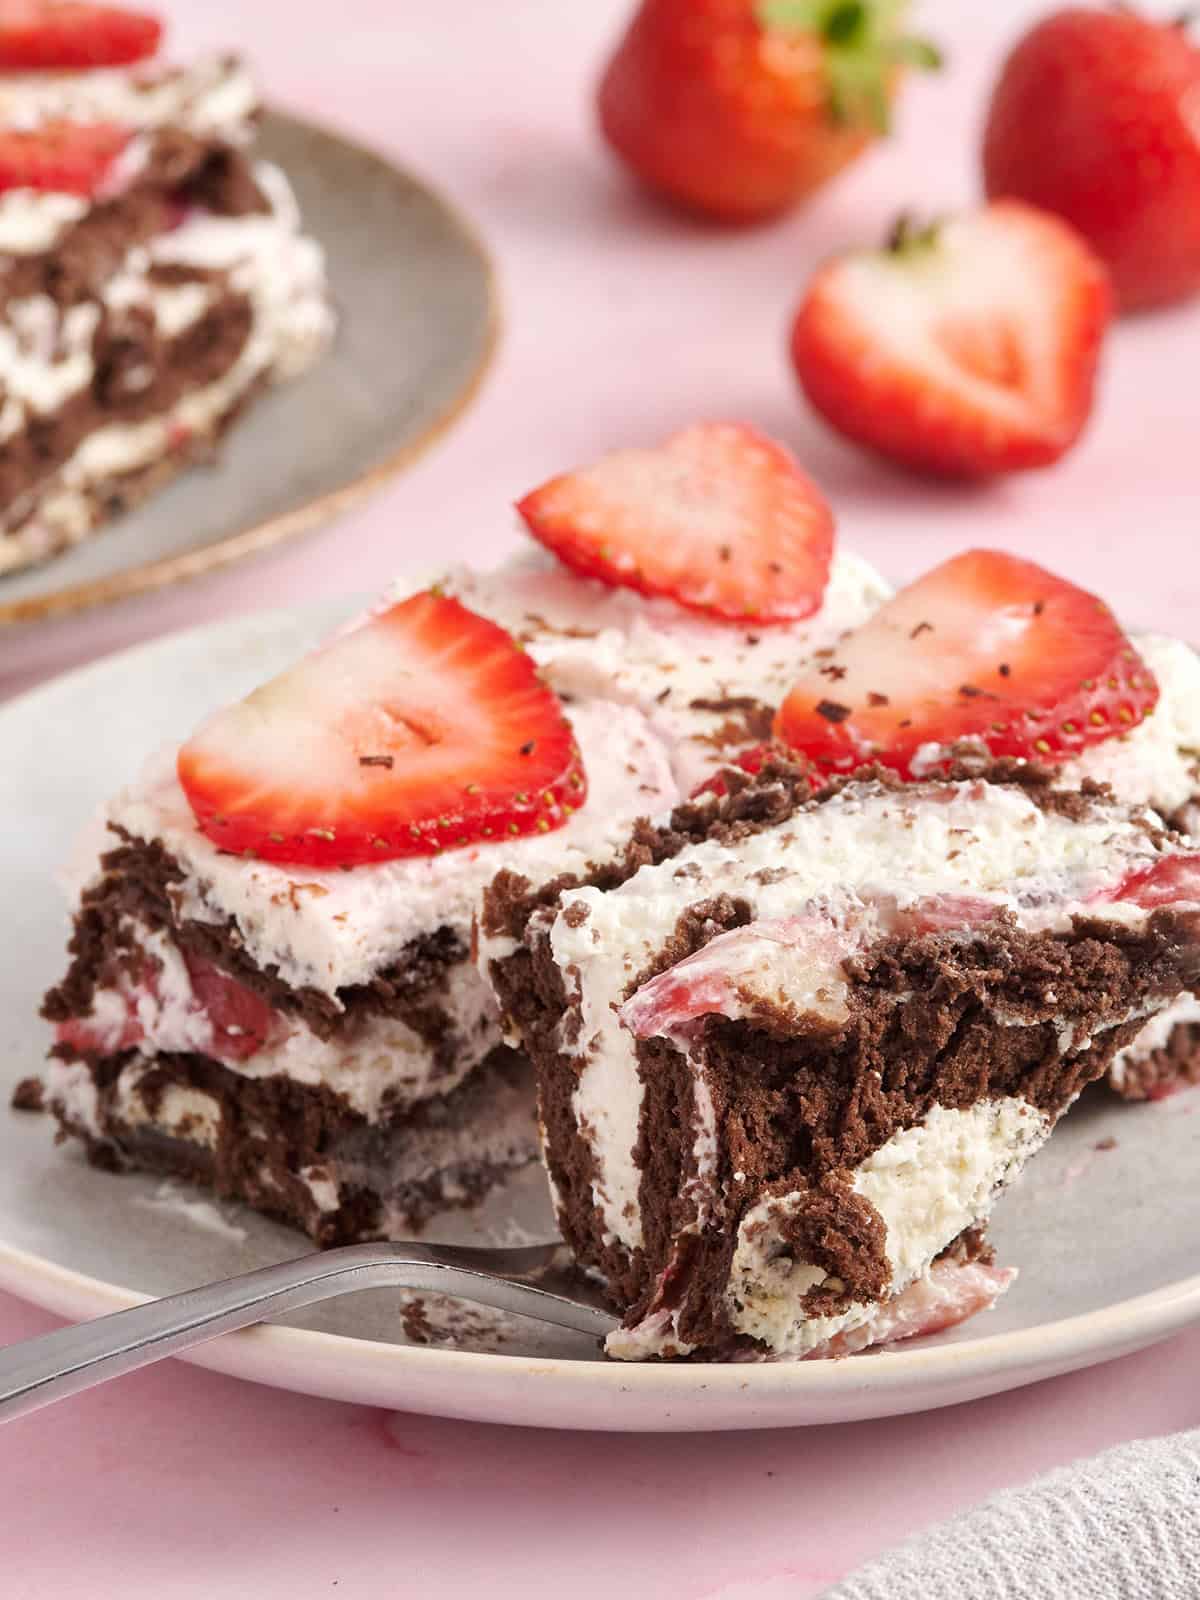
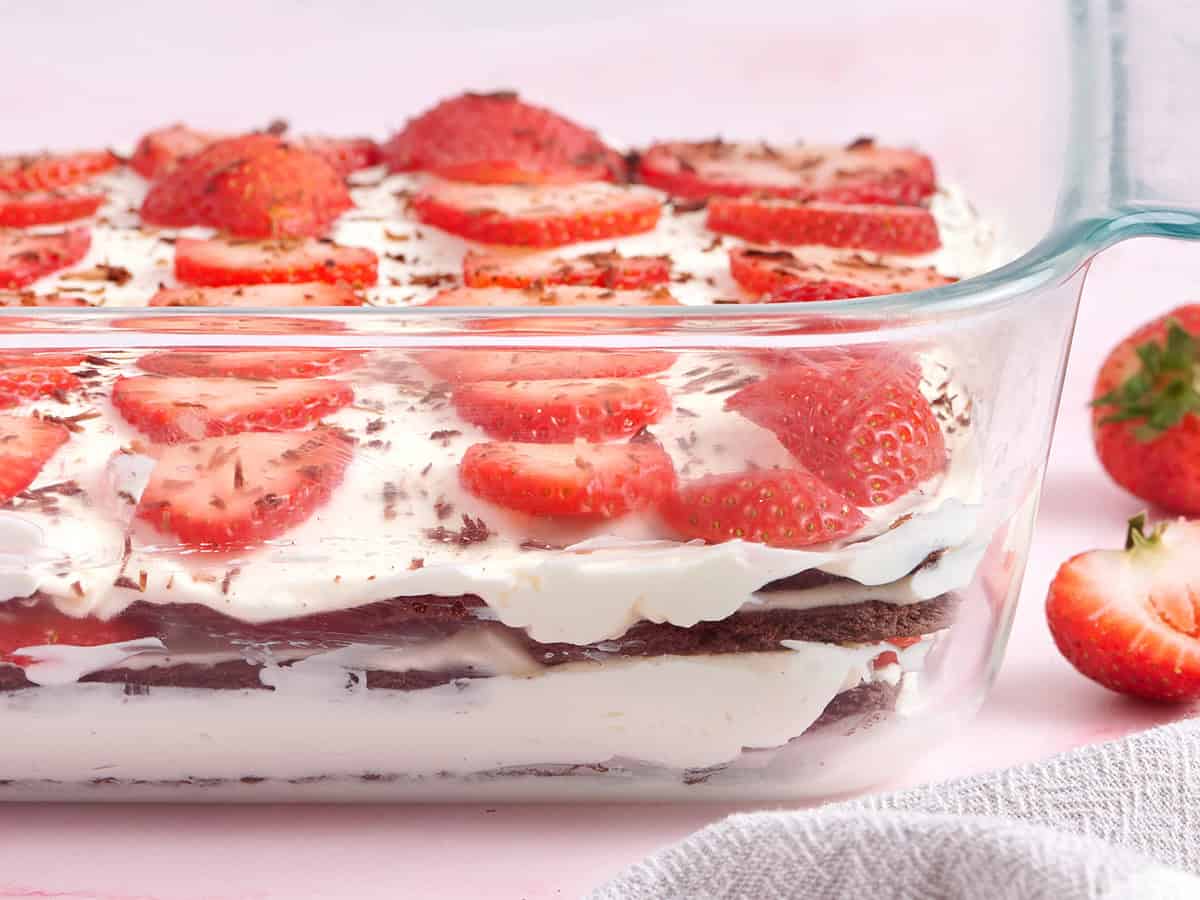
This icebox cake recipe is an old classic that first became popular in the 1920s when home refrigerators were starting to become a thing. Instead of baking, people cover cakes or biscuits with cream and let the refrigerator do the work. And to be honest, it’s still a bit of a magic trick. As this cake sits, the chocolate graham crackers absorb the moisture from the cream cheese whipped cream and soften into a thin, cake-like layer. I like using cream cheese here because it adds a little tang and helps the whipped cream stay put, so the cake slices come out clean and don’t turn into puddles of cream. Every bite is a beautiful combination of rich chocolate, smooth vanilla cream, and juicy strawberries. It’s nostalgic and fresh all at once.
What I love most is how low pressure this recipe is, no oven or complicated steps required. Just a simple layering and a little chill time. Budget friendly, easy to put together, and always manages to impress a crowd! That’s my kind of dessert.
- Start with softened cream cheese and cold heavy cream. I let the cream cheese soften first so that it whips smoothly and there are no small lumps in the filling, but I keep the heavy cream cold so that it is light and fluffy. For the smoothest filling, beat the cream cheese first, then slowly add the heavy whipping cream while mixing.
- Spread the cream on the bottom of the plate first. That first thin layer helps the chocolate graham crackers stay in place while you bake. This also ensures that the bottom layer of the cracker softens on both sides.
- Give it enough time to cool. I always give this icebox cake a minimum of 4 hours in the fridge, but overnight is even better! Longer cooling gives the graham crackers time to absorb the moisture from the cream cheese whipped cream, so the slices hold together, and the texture resembles cake.
- Budget saving tips: If strawberries are expensive or I just want to keep the price low, I’ll leave them out and skip the grated chocolate on top. You can also swap in other fruit you already have, such as blueberries, raspberries, or well-dried canned peaches. Or keep it without fruit for a more cookies-and-cream style freezer cake. Either way, it’s still creamy and delicious.
Chocolate Strawberry Icebox Cake
Cost $14.14 recipe / $1.18 serving
Make this strawberry chocolate Icebox Cake with 7 simple ingredients, no oven, and layers of chocolate graham crackers, strawberries, and whipped cream cheese filling!
-
In a large bowl, beat the softened cream cheese with a hand mixer until smooth. Add powdered sugar and vanilla, then stir until combined.
-
Slowly pour in the heavy cream and continue beating until the mixture is light, fluffy and creamy.
-
Spread a thin layer of cream mixture on the bottom of a 9×13 dish.
-
Add a layer of graham crackers, breaking them up as needed to fit.
-
Drizzle with about ⅓ of the cream mixture, then sprinkle 1 cup of sliced strawberries on top.
-
Repeat two more times (grahams, cream, berries), ending with cream and sliced berries on top.
-
Cover and refrigerate for at least 4 hours, or overnight, until the graham crackers have softened to a cake-like texture.
-
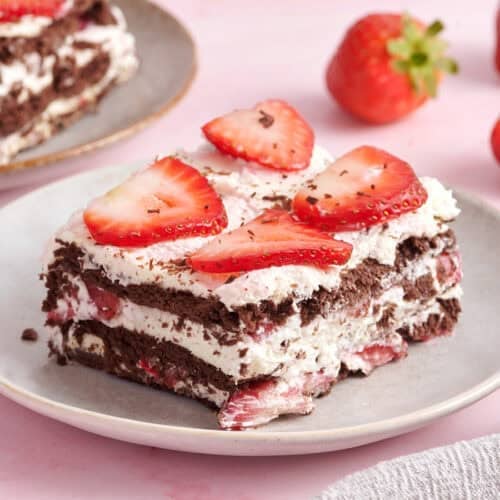
Slice into squares and serve cold. Garnish with grated chocolate if desired.**
See how we calculate prescription costs here.
**You can use whipped topping (such as Cool Whip) instead homemade whipped cream. Just gently fold in the whipped cream cheese until combined in Step 2.
***I like to finish the top with a sprinkle of grated chocolate from the baking bar—it adds a little texture and richness. At all optionalalthough!
Portion: 1sliceCalories: 395kcal (20%)Carbohydrate: 36G (12%)Proteins: 5G (10%)Fat: 27G (42%)Sodium: 279mg (12%)Fiber: 3G (13%)
how to make Icebox Cake step by step photos
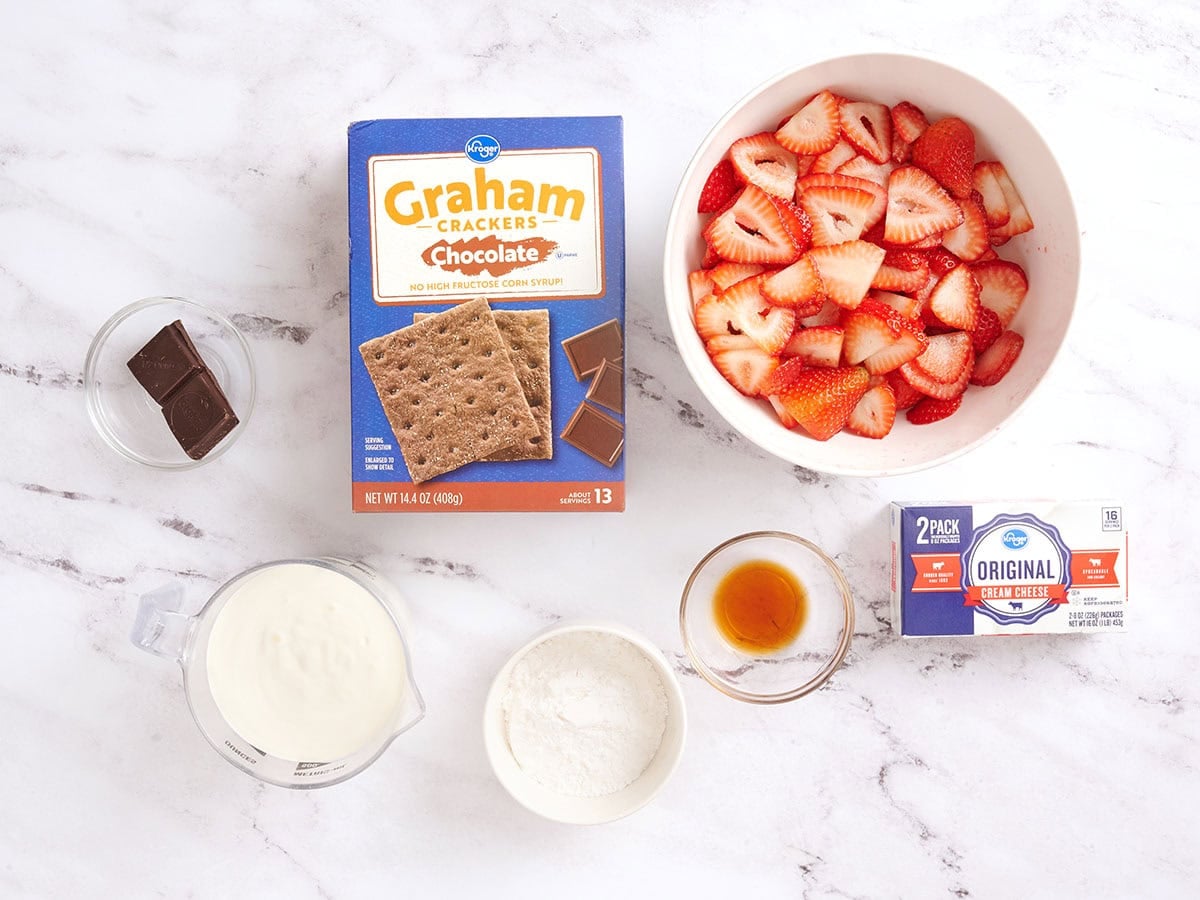
Gather all your ingredients.
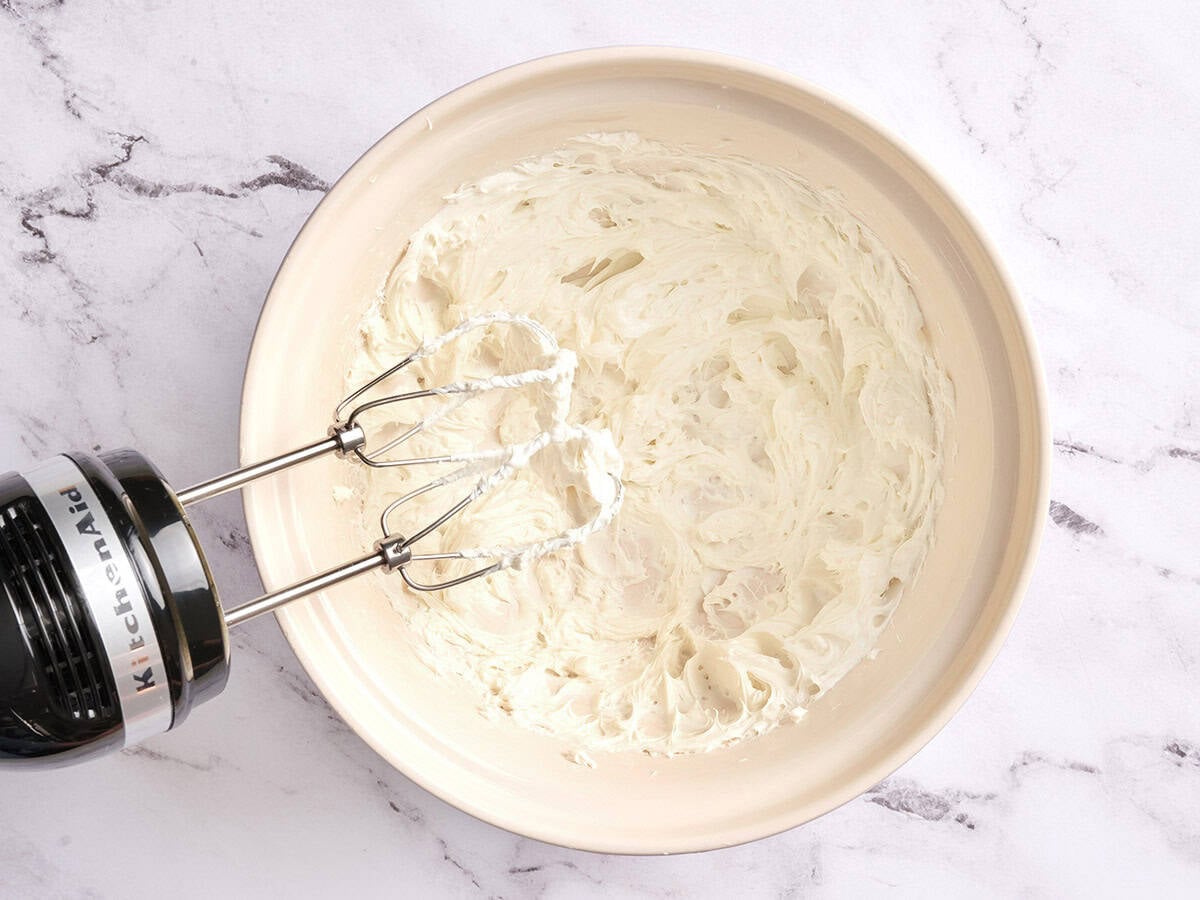
Whipped cream cheese: Add the softened 8 oz. cream cheese into a large bowl and beat with a hand mixer until completely smooth and creamy with no visible lumps.
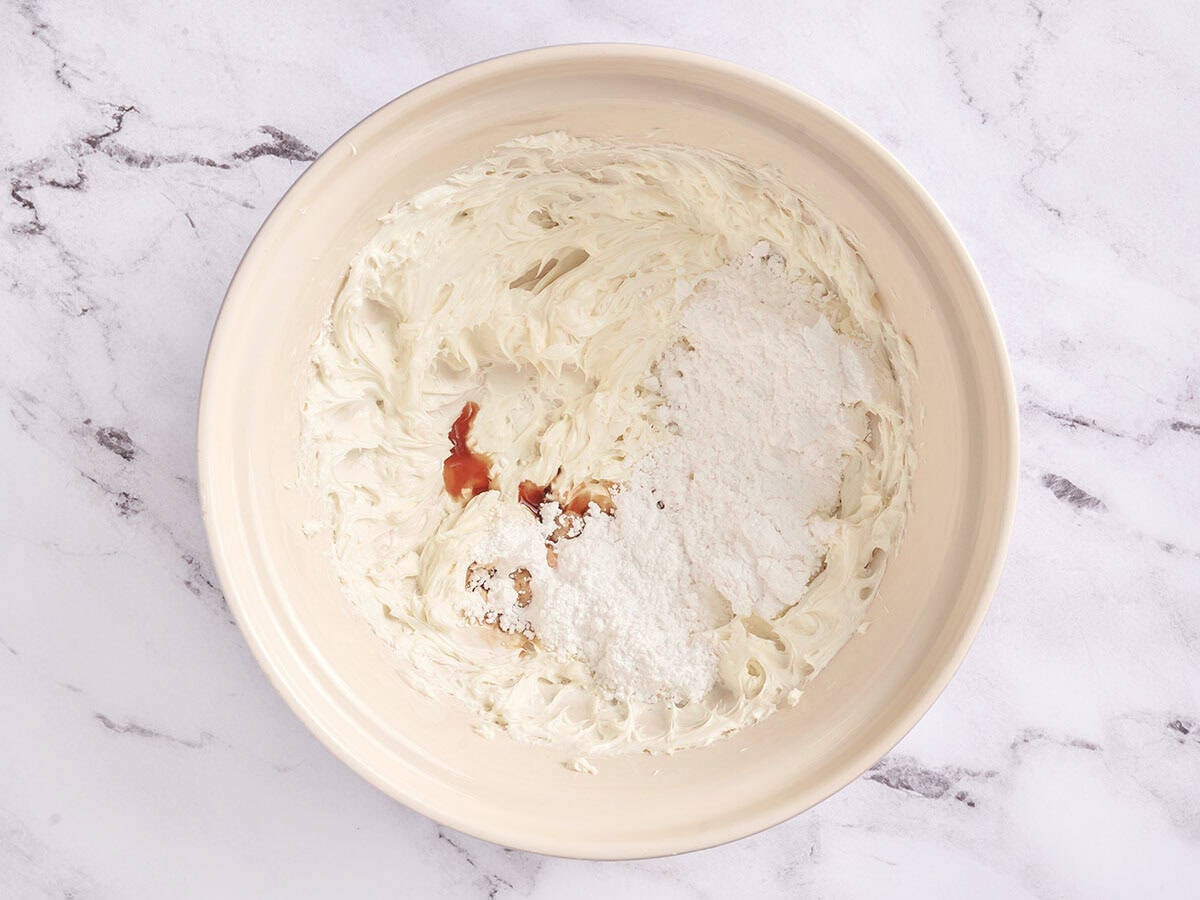
Add ½ cup powdered sugar and 1 tsp vanilla extract, then beat again until combined.
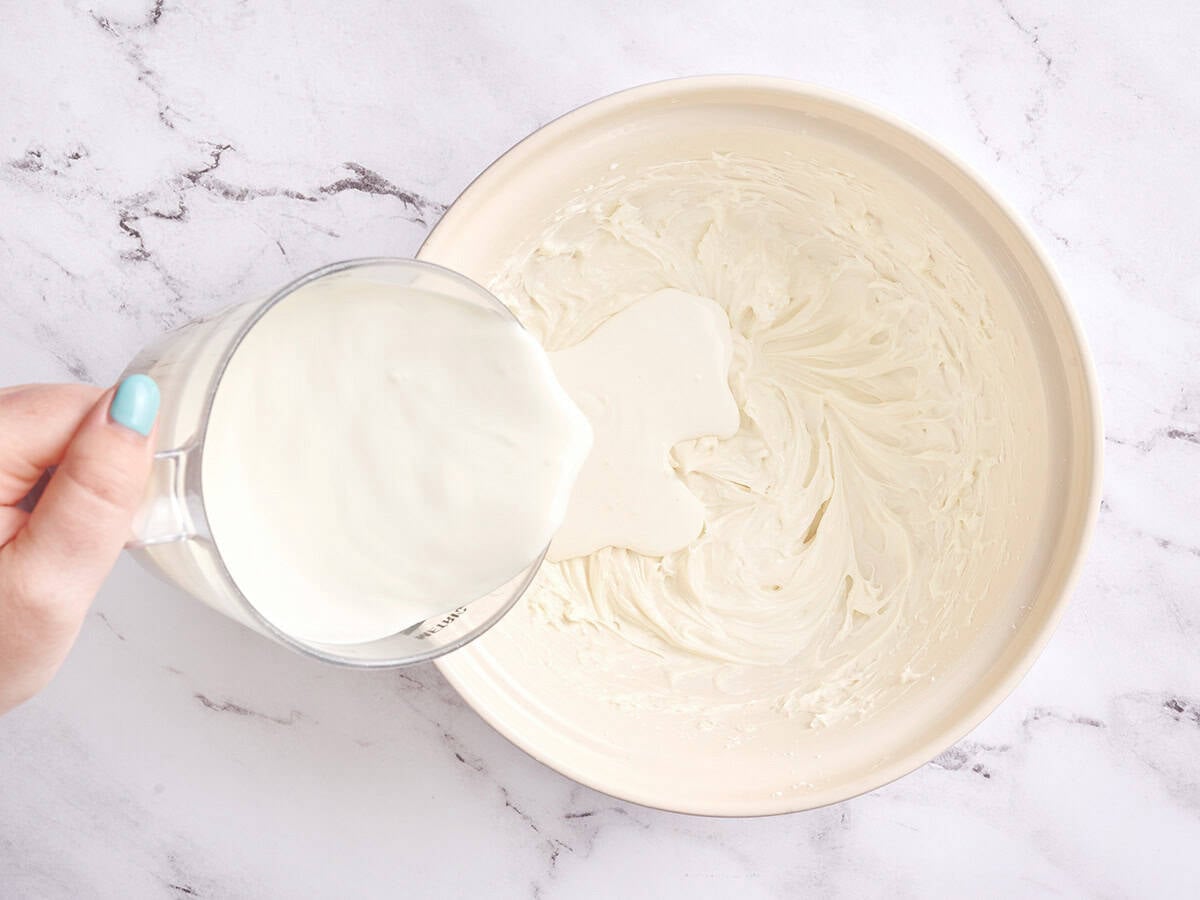
Add heavy cream: Slowly pour in 2 cups of heavy whipping cream while mixing on low speed.
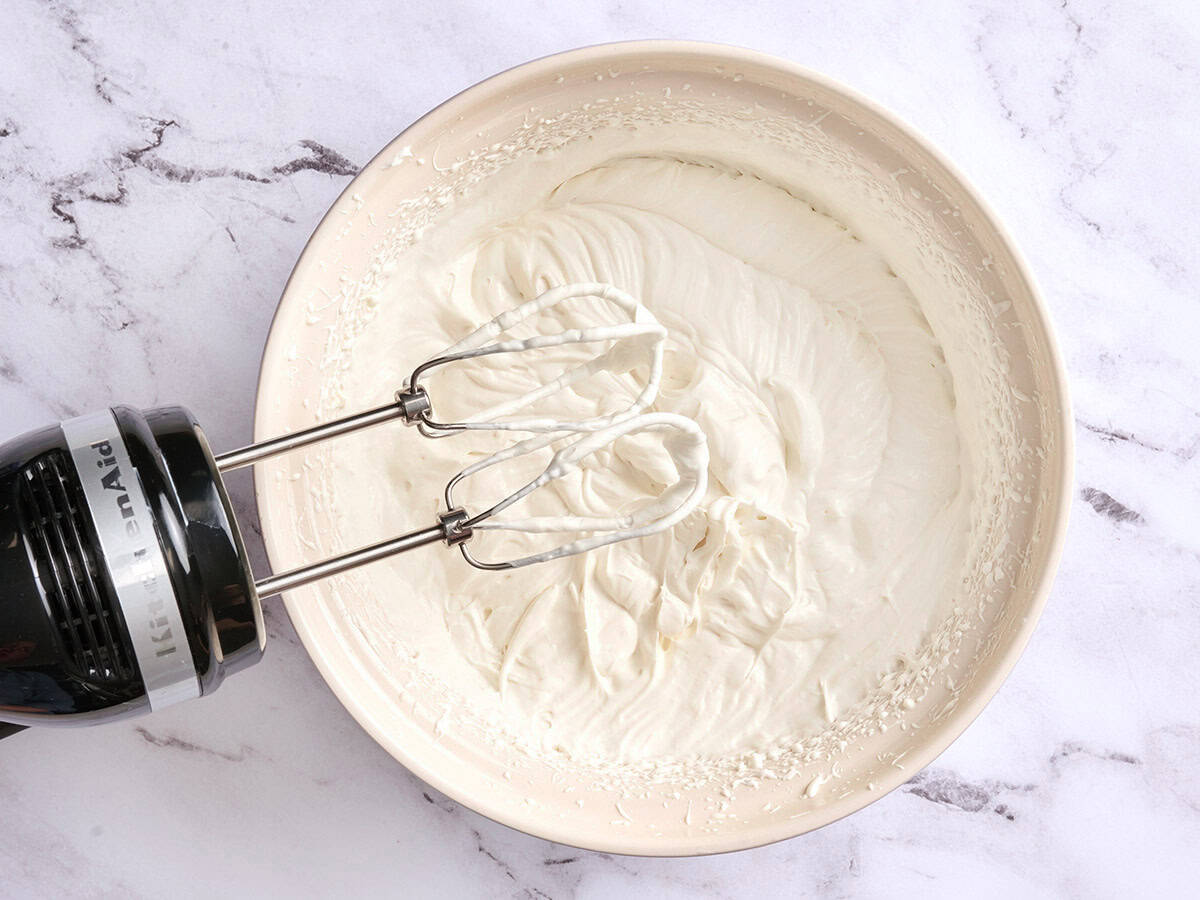
Then increase the speed and beat until the mixture is light, fluffy, and thick enough to hold soft peaks. It should look airy and spread easily, not loose or runny.
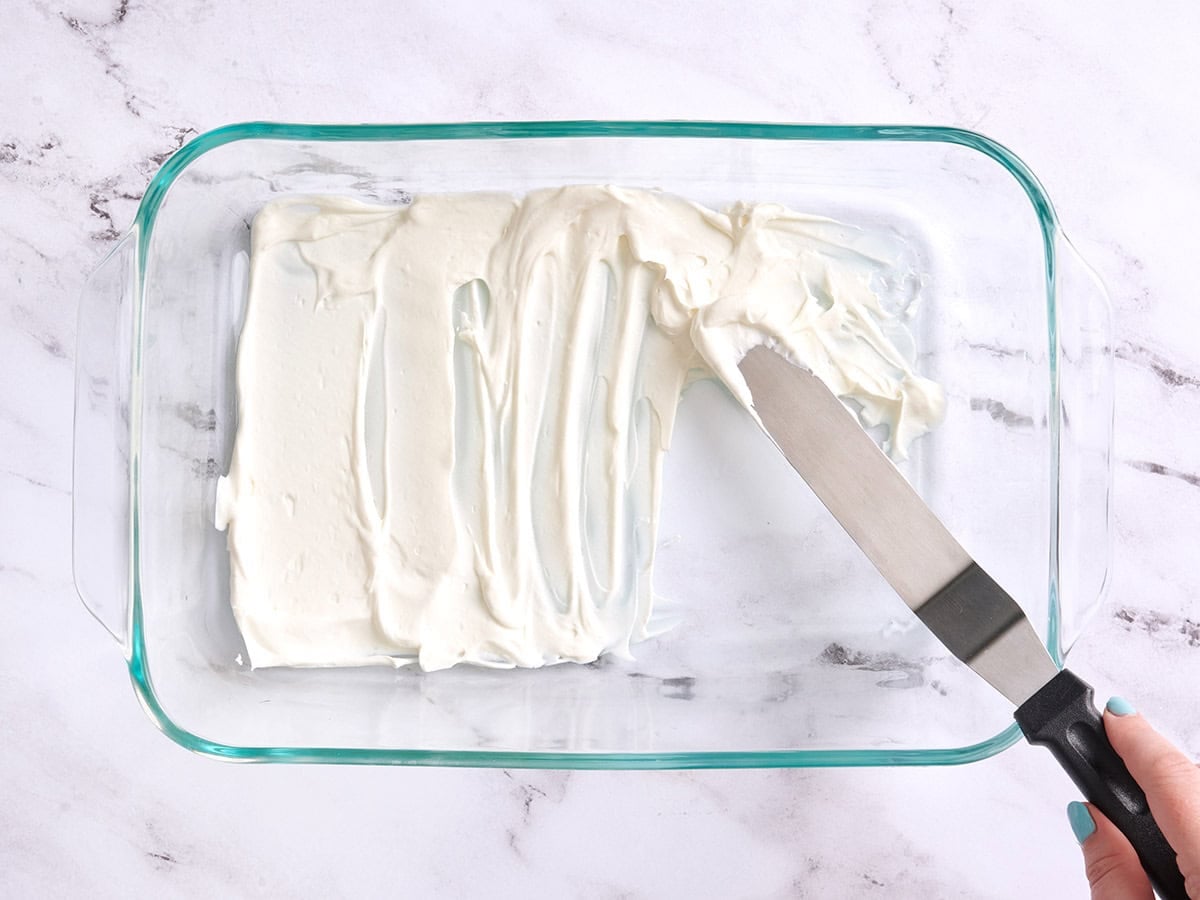
Assembling the ice box cake: Spread a thin layer of cream mixture on the bottom of a 9×13 dish. This helps the first layer of graham crackers stay in place and soften evenly.

Arrange a layer of chocolate graham crackers on top of the cream, breaking them up as needed to fit onto the plate. Don’t worry if the cut isn’t perfect; they’ll soften as the cake cools, and no one will know the difference anyway!
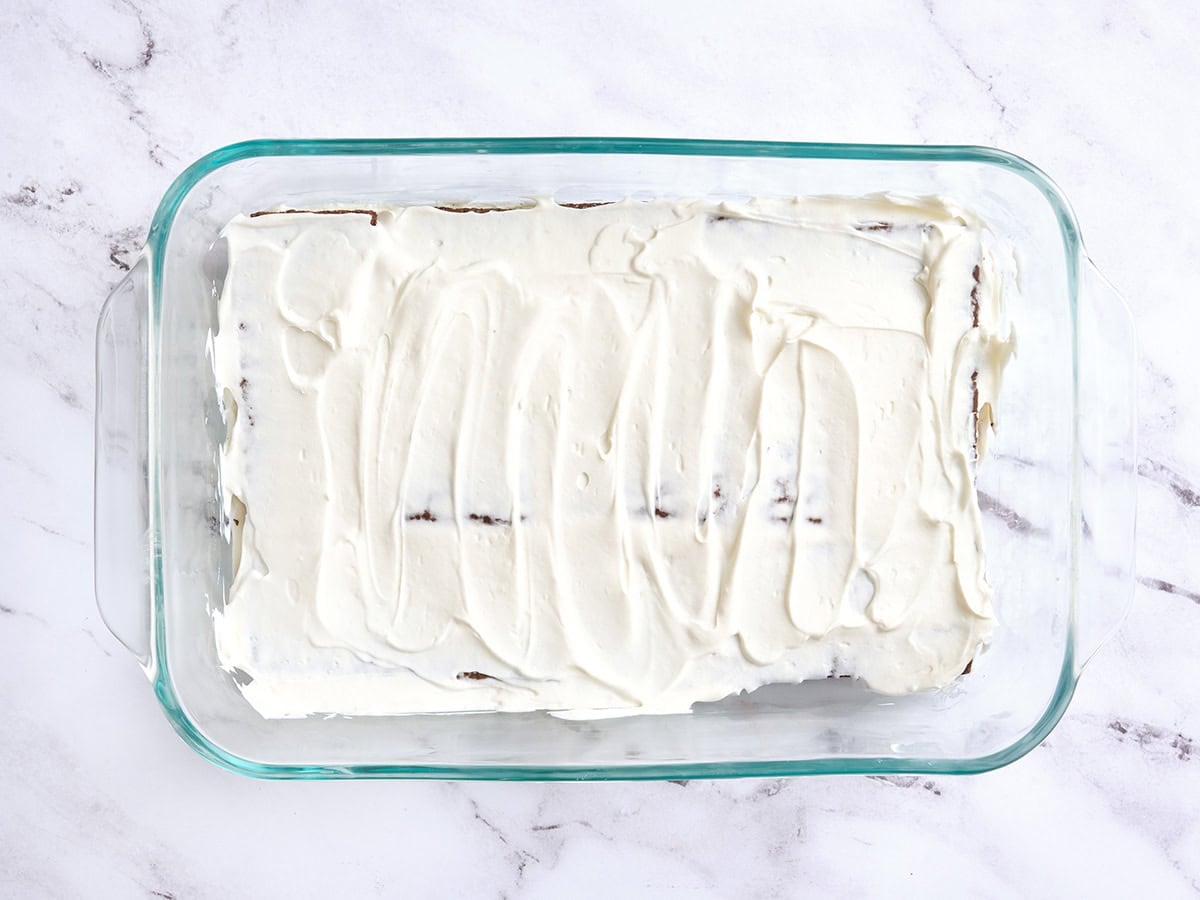
Next, spread about a third of the cream mixture over the graham crackers, all the way to the edges.
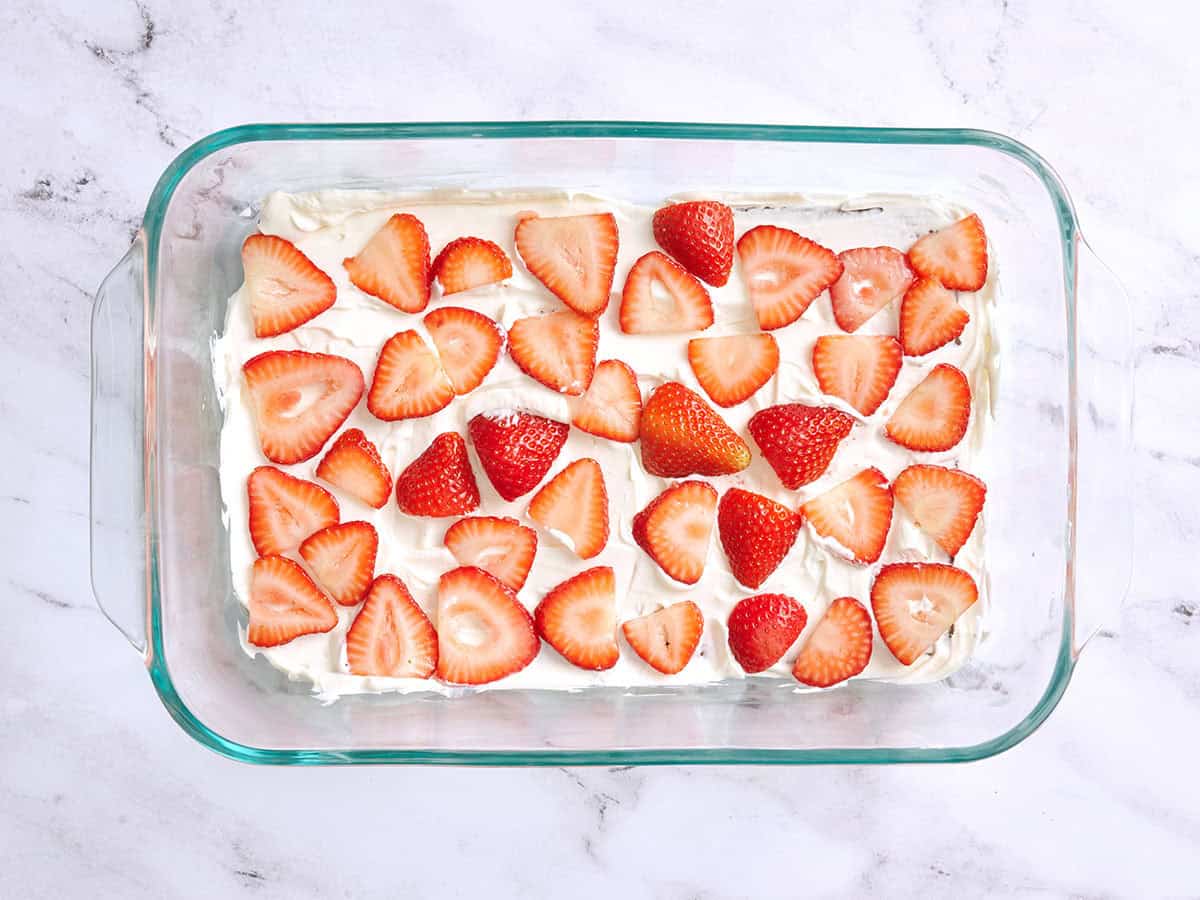
Top with 1 cup of sliced strawberries, spreading them out evenly so each slice gets plenty of fruit.
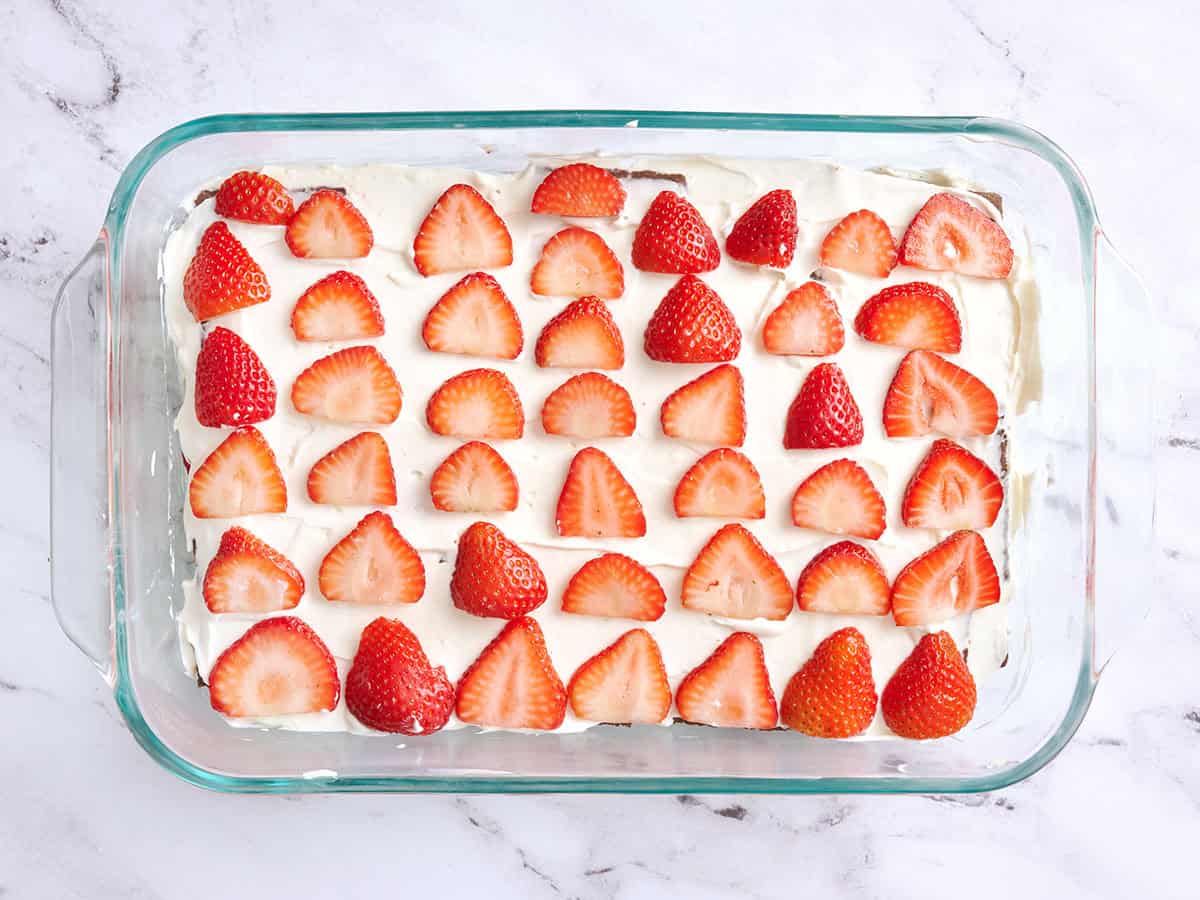
Finish and cool: Repeat this layer two more times with graham crackers, cream, and 1 cup sliced strawberries each time. Finish with the remaining cream mixture and the final 1 cup of sliced strawberries on top.
Cover the dish and refrigerate for at least 4 hours, or overnight for the best texture. As they cool, the graham crackers will soften and turn cake-like, while the cream creates a cool, sliceable filling!
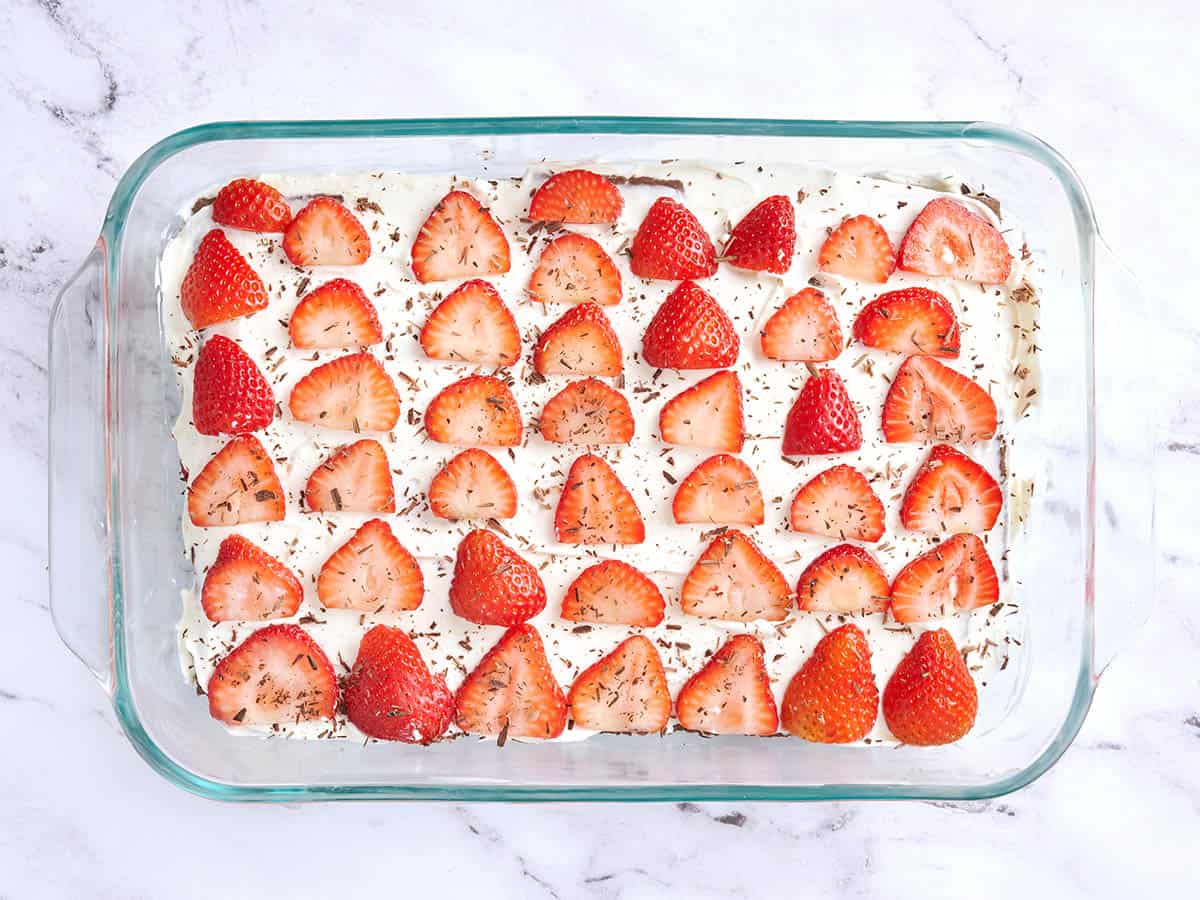
Decoration: Grate 2 squares unsweetened baking chocolate over the top before serving, if using, for a beautiful finish and a little extra chocolate flavor. Slice the icebox cake into squares and serve cold. Enjoy!
Serving Suggestions
Make sure this chocolate graham cracker icebox cake is completely cool before slicing. This will cut cleaner and maintain its shape better. I like to use a sharp knife and wipe it clean between slices to get the neatest squares, especially if I’m serving it for a cookout, potluck, or birthday dessert. If you want to dress it up even what’s more, don’t skip the freshly grated chocolate, and add a dollop of whipped cream or a drizzle of strawberry syrup before serving! This icebox cake is rich and creamy but still light enough for summer, so I usually cut it into 12 large slices, but you could definitely expand it to 15 smaller slices if you’re feeding more people.
This is the kind of dessert that I LOVE to make ahead of time because the fridge does all the work while I do other things. For the best texture, assemble this icebox cake the day before and let it cool overnight. The next day, the chocolate graham crackers will have softened into a beautiful cake-like layer, and everything will slice more neatly.
Storage Instructions
Store your chocolate strawberry icebox cake tightly covered in the refrigerator for up to 3 days. It actually gets better after the first day as the layers continue to fuse and soften!
Freezer
You can freeze this cake, although the texture of the strawberries will soften a bit once thawed, so you might want to leave it out if you plan to freeze it. If frozen, wrap cake tightly in plastic wrap and then foil, or store in a freezer-safe container. Freeze for up to 1 month. Thaw overnight in the refrigerator before serving.
Love No-Bake Desserts? Try This Next!
PakarPBN
A Private Blog Network (PBN) is a collection of websites that are controlled by a single individual or organization and used primarily to build backlinks to a “money site” in order to influence its ranking in search engines such as Google. The core idea behind a PBN is based on the importance of backlinks in Google’s ranking algorithm. Since Google views backlinks as signals of authority and trust, some website owners attempt to artificially create these signals through a controlled network of sites.
In a typical PBN setup, the owner acquires expired or aged domains that already have existing authority, backlinks, and history. These domains are rebuilt with new content and hosted separately, often using different IP addresses, hosting providers, themes, and ownership details to make them appear unrelated. Within the content published on these sites, links are strategically placed that point to the main website the owner wants to rank higher. By doing this, the owner attempts to pass link equity (also known as “link juice”) from the PBN sites to the target website.
The purpose of a PBN is to give the impression that the target website is naturally earning links from multiple independent sources. If done effectively, this can temporarily improve keyword rankings, increase organic visibility, and drive more traffic from search results.